The Best Fluffy Pancakes recipe you will fall in love with. Full of tips and tricks to help you make the best pancakes.

If your furry companion has been dropping not-so-subtle hints about wanting better treats, it's time to step up your game in the New Year. You'll discover that making homemade cat treats isn't just a way to spoil your pet—it's an investment in their health and happiness. Whether you're a kitchen novice or a seasoned chef, you can create tasty morsels that'll have your cat purring with delight. The best part? You're about to learn how simple and rewarding this kitchen adventure can be.
Why Your Cat Deserves Homemade Treats This Year
Pet parents, your feline friend deserves the very best, and there's no better way to show your love than with homemade cat treats.
The cat treat benefits are endless – you'll provide your furry companion with high-quality, natural ingredients while avoiding those unnecessary chemicals and preservatives found in store-bought options. Making treats at home is also a wonderful family bonding activity. Studies have shown that minimizing cat allergens in your home can lead to happier and healthier pets, as well as a more pleasant environment for everyone. The quick prep time of 30 minutes total makes these treats an easy addition to your routine.
When you focus on feline nutrition through homemade treats, you're giving your cat exactly what they need: lean proteins for energy, healthy fats for a gorgeous coat, and fiber for smooth digestion.
You can customize recipes to match your cat's specific needs, whether they're watching their weight or have a sensitive stomach. Plus, you'll save money while creating something special for your beloved pet.
It's a win-win situation that'll have your cat purring with delight!
Essential Ingredients for Safe and Healthy Cat Treats
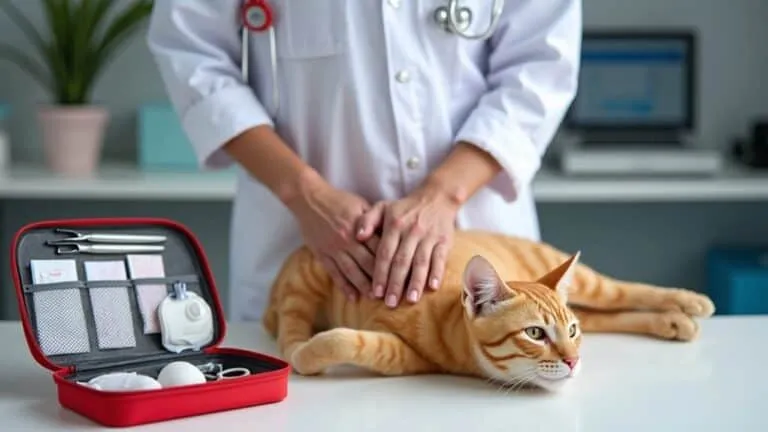
Making nutritious cat treats at home starts with knowing exactly what goes into them. When choosing safe ingredient choices, you'll want to focus on high-quality animal proteins like chicken, turkey, or beef, making up about 30% of your treats. Additionally, creating a calming environment for your cat during treat time can enhance their overall experience and reduce anxiety associated with new foods or routines.
Don't forget to include healthy fats – they're essential for your kitty's energy and coat health. Canned salmon provides an excellent source of omega-3 fatty acids that cats love. Treats should contain around 30% fat from whole food sources for optimal nutrition.
For perfect nutrient balance, mix in small amounts of cat-friendly fruits and vegetables to provide fiber and antioxidants. Just remember to keep fiber content between 1-5% to avoid tummy troubles.
You'll also want to incorporate calcium-rich ingredients like eggs, and consider adding antioxidant powerhouses like blueberries.
Keep treats to less than 10% of your cat's daily calories – after all, even the healthiest treats should be given in moderation.
Top 5 Easy-to-Make Cat Treat Recipes

You'll love making these simple tuna crunchers and salmon-catnip bites that'll have your kitty purring with delight.
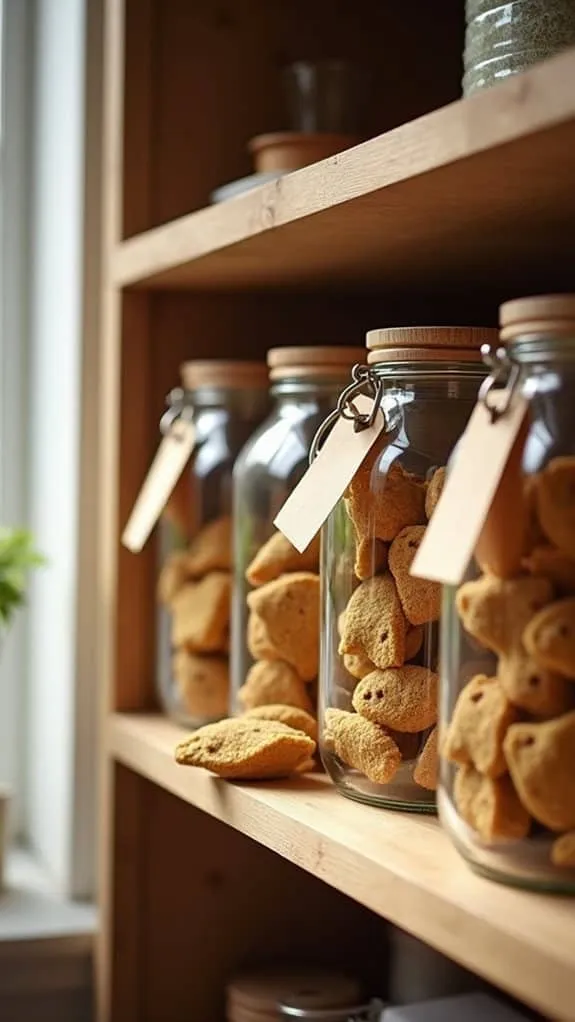
With just a few basic ingredients like canned tuna or salmon, flour, and eggs, you can whip up these treats in under 30 minutes. Be sure to use thoroughly cooked eggs to eliminate harmful bacteria, ensuring your cat's safety. These treats can be safely stored in containers for up to a week when refrigerated.
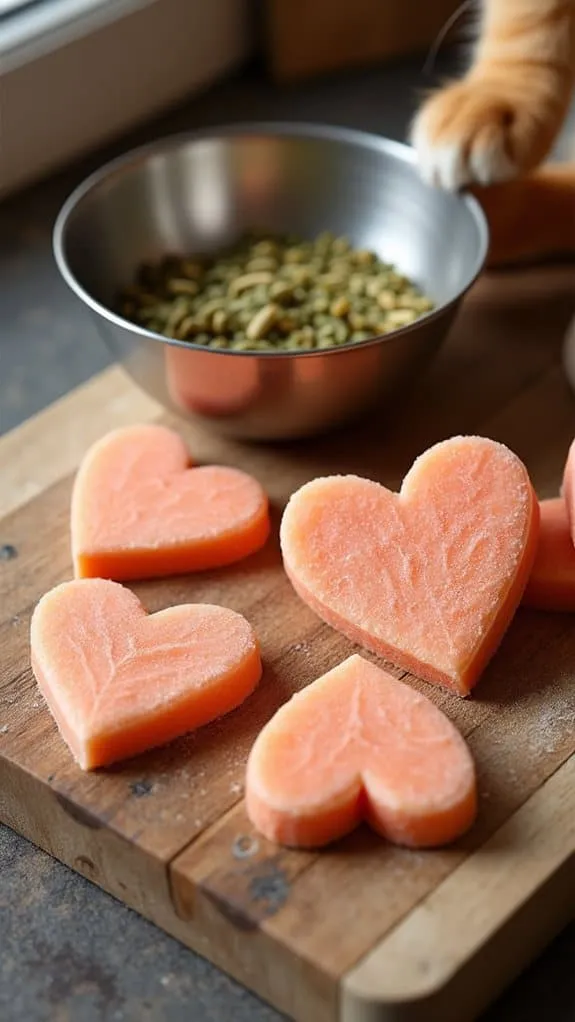
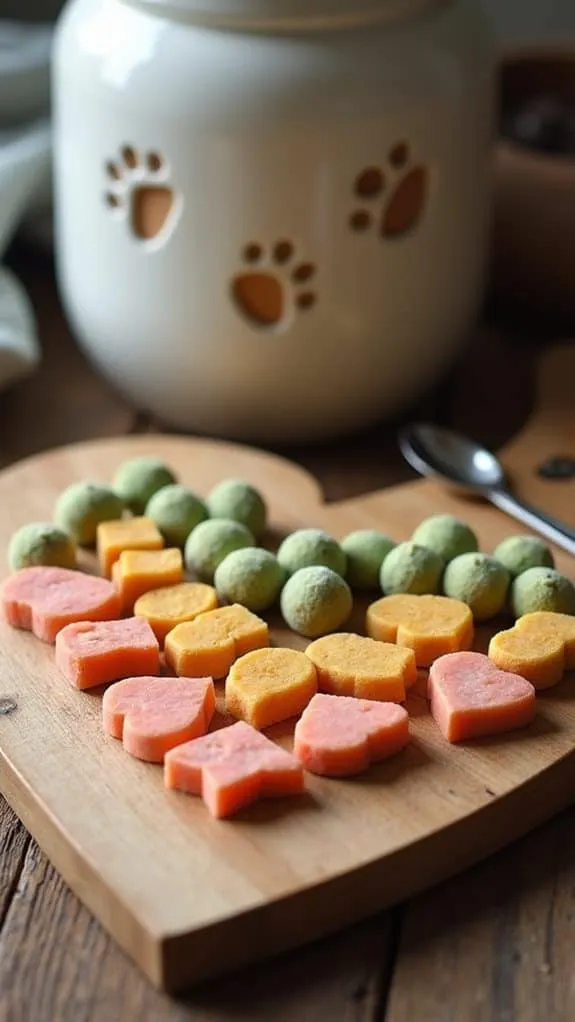
The secret to making these treats extra special is adding a sprinkle of catnip to the salmon bites, which turns ordinary treats into your cat's new favorite snack. For extra feline appeal, you can use a fish-shaped cutter to make the treats more visually appealing.
Simple Tuna Crunchers Recipe
These delicious Tuna Crunchers are one of the simplest homemade cat treats you'll ever make, requiring just four basic ingredients you probably already have in your kitchen.
Simply blend undrained tuna until smooth, mix it with flour and a beaten egg, and you're ready to create these paw-some treats! Using whole wheat flour is essential since cats can't properly digest regular flour and maintaining a balanced diet supports their overall skin health.
Roll out your dough to 1/4 inch thickness and cut into fun shapes your feline friend will love. Remember to line baking tray with parchment paper before placing your treats.
If you're looking for tuna alternatives, you can experiment with salmon or chicken.
For the best baking tips, remember to keep an eye on your treats as they turn golden brown, usually around 15 minutes at 350°F.
Once cooled, store them in an airtight container, and watch your kitty's eyes light up every time you reach for these crunchy, homemade delights!
Salmon-Catnip Bites Tutorial
While tuna treats are always a hit, salmon lovers will purr with delight over these irresistible Salmon-Catnip Bites. These treats can be stored for weeks when properly sealed. Feeding your cat a balanced diet is essential for their health, and these homemade treats can be a nutritious addition to their meals.
You'll need just two main ingredients – canned salmon and fresh catnip flowers – to create these delectable treats in your COSORI food dehydrator. The 145°F temperature setting ensures optimal dehydration of the fish patties for perfect texture.
The cat treat benefits are impressive, and if you're looking for salmon alternatives, you've got options:
- Switch up the protein with tuna, mackerel, or shrimp
- Add an egg for extra protein and binding
- Mix in whole wheat flour for more structure
- Try different herbs your cat loves
- Make larger batches to freeze for later
Simply shape the mixture into small patties, dehydrate at 145°F for three hours, and let them cool completely.
Your feline friend will thank you with endless head bumps and purrs!
Making Cat Treats: Step-by-Step Guide
Creating homemade cat treats can be a rewarding experience that lets you control exactly what goes into your feline friend's snacks.
You'll find endless cat treat flavors to explore, from classic tuna to savory salmon combinations.
To get started, gather your ingredients and preheat your oven to 350°F. Mix your chosen protein with whole wheat flour, and add an egg to bind everything together.
Here's a helpful baking tip: the mixture should be firm enough to roll into small balls or cut into shapes. Place your treats on a parchment-lined baking sheet, and press them gently with a fork.
Bake for 10-20 minutes until they're slightly browned on the bottom. Once they've cooled completely, you'll have healthy, homemade treats that'll make your cat purr with delight! Regularly offering these treats can also enhance the bond and trust between you and your cat through shared, positive experiences during grooming or playtime, contributing to your cat's overall psychological and emotional wellbeing.
Storing and Preserving Your Homemade Cat Treats
Once you've baked a delicious batch of homemade cat treats, proper storage becomes essential for maintaining their freshness and safety.
To maximize treat shelf life and guarantee food safety, you'll want to store them in airtight containers and keep them in the refrigerator for up to 7 days. For longer storage, freeze your treats for up to 3 months – your kitty won't know the difference!
Here are five key storage tips to keep your treats fresh:
- Let treats cool completely before storing to prevent moisture buildup
- Use parchment paper between layers to prevent sticking
- Store in the coldest part of your fridge for maximum freshness
- Freeze treats individually on a parchment-lined pan before bagging
- Always check for signs of spoilage before serving to your feline friend
Common Mistakes to Avoid When Making Cat Treats
When you're making treats for your feline friend, it's essential to measure ingredients precisely rather than eyeballing amounts, as incorrect proportions can affect both nutrition and safety.
You'll also want to resist the temptation to let your cat sample the treats right away, as proper cooling time guarantees they reach the right consistency and temperature.
Remember that rushing these steps might seem like a time-saver, but it could lead to treats that aren't safe or enjoyable for your cat.
Measuring Ingredients Too Loosely
The simple act of eyeballing ingredients might seem harmless, but loose measuring can spell trouble for your cat's homemade treats.
Using proper measuring tools and maintaining consistent portion control isn't just about being precise – it's about keeping your feline friend healthy and happy.
You'll want to ditch those liquid measuring cups and opt for dry-food measuring tools instead.
Here's what you need to know about accurate measuring:
- Use a kitchen scale for the most precise measurements
- Level off ingredients with a straight edge rather than eyeballing
- Choose the right measuring cups designed specifically for dry ingredients
- Measure your daily portions all at once to guarantee consistency
- Keep your measuring tools clean and dedicated to cat treat-making only
- Proper measuring helps promote healthy skin and coat, which is essential for your cat's overall well-being.
Skipping Cooling Time
Skipping the cooling time of homemade cat treats might be tempting, but you'll regret skipping this essential step.
Without proper cooling techniques, your treats won't break apart correctly, and they'll likely stick together during storage, creating a frustrating mess for both you and your feline friend.
To guarantee the best results, transfer your treats to a cooling rack and let them reach room temperature completely.
Once they're cooled, you'll find they break apart easily along score marks and maintain the perfect texture your cat will love.
For proper storage, keep them in the refrigerator for up to a week, or freeze them for longer shelf life. Additionally, maintaining a balanced diet can contribute to overall coat health, which may enhance your cat's enjoyment of these treats.
Creating a Treat Schedule for Your Feline Friend
Maintaining a balanced treat schedule for your cat can make a significant difference in their overall health and happiness. When it comes to treat portioning, remember that treats shouldn't exceed 5% of your cat's daily calories.
You'll want to reflect on your feline's preferences while ensuring their nutritional needs are met.
Here's what you'll need to keep in mind for successful treat scheduling:
- Set specific times for treats to establish a routine
- Mix up treat varieties to keep your cat interested
- Track daily portions to prevent overfeeding
- Use treats strategically during training sessions
- Choose treats that match your cat's life stage and health needs. Additionally, ensure that you provide adequate hydration to complement the treats, as optimal hydration supports overall health.
Final Thoughts
You've spent countless hours perfecting these homemade treats, only to find your cat more interested in the cardboard box they came in – but don't lose heart! While your feline friend might initially turn their nose up at your culinary creations, they'll eventually come around to appreciate your efforts. Remember, you're not just making treats; you're crafting love in edible form, even if your cat pretends not to notice.