The Best Fluffy Pancakes recipe you will fall in love with. Full of tips and tricks to help you make the best pancakes.
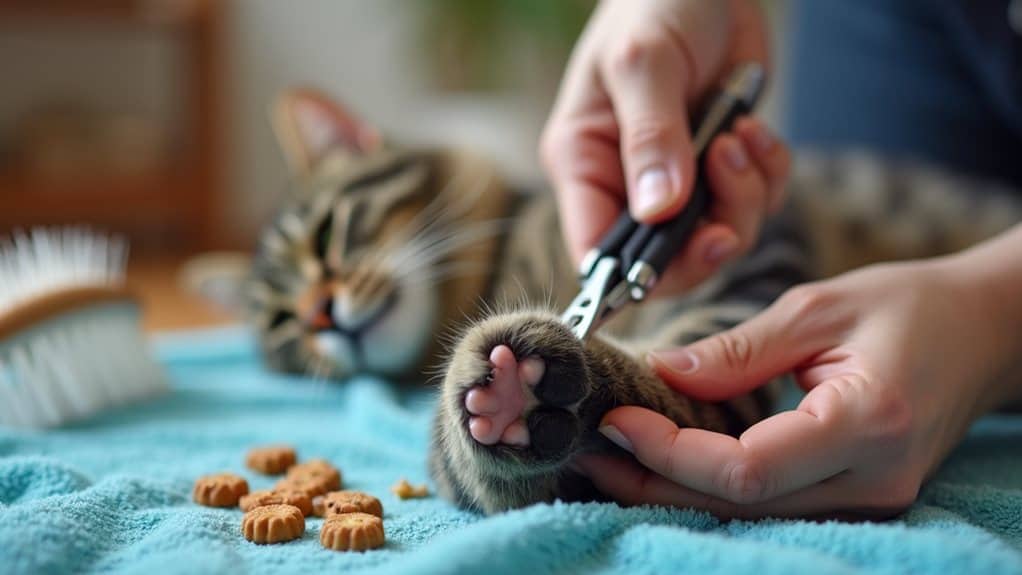
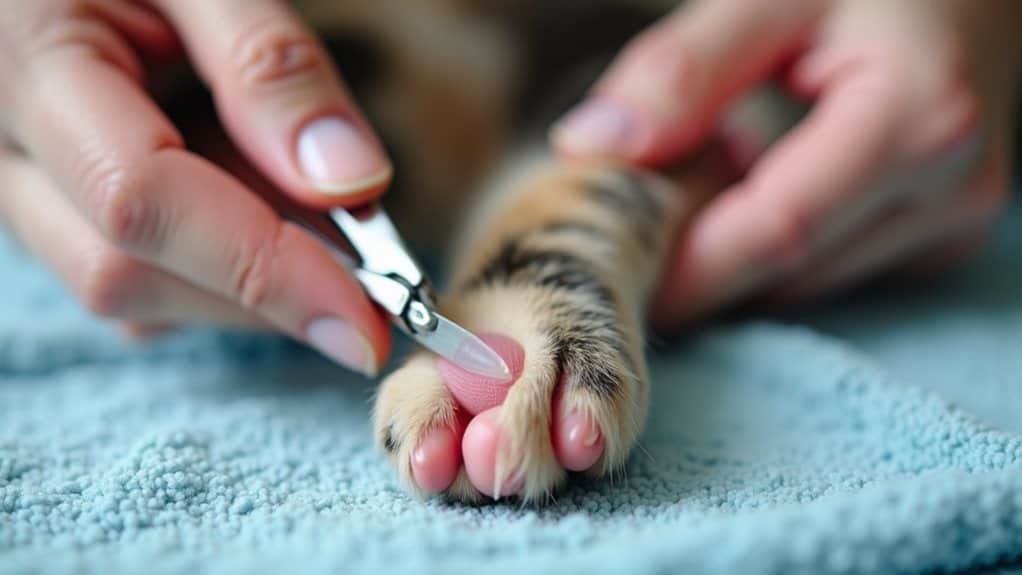
To trim your cat’s nails stress-free, gather quality clippers, treats, and find a quiet spot when your cat is relaxed. Gently press their paw pad to extend the claw, then clip only the white tip—never the pink quick. Keep sessions short, rewarding with treats after each paw. If your cat gets anxious, try again later or just do one paw per day. The right approach transforms nail care from a battle into a bonding experience.
Why Regular Nail Trimming Matters for Your Cat’s Health
When you neglect your cat’s claws, you’re setting the stage for a host of potential problems. Overgrown nails can curl and grow into your cat’s paw pads, causing pain, infection, and difficulty walking. Ouch!
Regular trimming is crucial for nail health and keeps your furry friend comfortable. Those sharp claws can accidentally scratch you during play, snag on fabrics, or damage your furniture. Think of nail maintenance as injury prevention for everyone in your home—including your cat!
Wild cats naturally wear down their claws through climbing and scratching, but your indoor kitty doesn’t have the same opportunities. That’s where you come in! Regular trimmings ensure that their nails remain at a safe length and help to maintain their overall paw health.
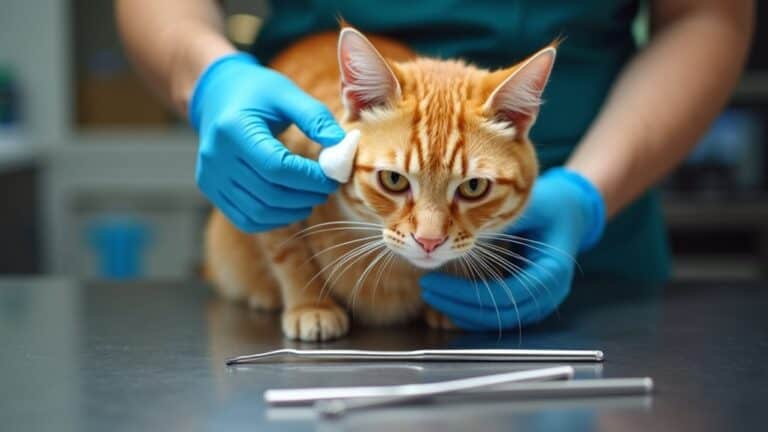
Essential Tools for Safe and Effective Nail Trimming
Now that you understand why keeping your cat’s nails trimmed is so important, let’s talk about the right tools for the job. Having proper equipment makes all the difference between a stressful ordeal and a quick, painless session.
The most vital item is a pair of quality nail clippers designed specifically for cats. Human nail clippers won’t cut it—they can split or crush your cat’s claws! Look for scissors-type or guillotine-style nail clippers that provide clean cuts.
Nail files are handy companions for refining any rough edges after trimming.
Don’t forget about treats! They’re not technically tools, but they’re absolutely imperative for creating positive associations. Positive reinforcement is key in ensuring that your cat remains relaxed throughout the process.
A towel for wrapping your nervous kitty and good lighting to see the quick (the sensitive pink area) will complete your nail-trimming toolkit.
Understanding Your Cat’s Paw Anatomy
The remarkable design of your cat’s paws holds the key to successful nail trimming. Familiarizing yourself with your cat’s paw structure will make the process easier for both of you.
Cats have retractable claws that extend when needed and remain hidden in protective sheaths when relaxed. Regular nail growth occurs from the base, pushing the older nail forward—much like human nails.
- Feel the difference between the pink quick (sensitive area with blood vessels) and the white nail tip (safe to trim)
- Notice how each toe can flex independently, giving cats their amazing climbing abilities
- Watch how the pads provide cushioning and protection during movement
- Observe the way cats instinctively extend claws when startled—a natural defense mechanism, which is why understanding the sensory functions of whiskers can also aid in their comfort during nail clippings.
Creating a Calm Environment Before You Begin
Before snipping your cat’s nails, you’ll need to set the stage for success with a peaceful environment.
Find a quiet spot in your home where you won’t be interrupted, and gather all your supplies beforehand so you’re not scrambling mid-trim.
Starting with a gentle petting session will help relax your furry friend and make the nail-trimming experience less stressful for both of you. Additionally, understanding your cat’s body language can help you gauge their comfort level throughout the process.
Choose Quiet Location
Creating a calm environment begins with selecting a quiet location where you and your cat won’t be disturbed. The right peaceful atmosphere can make all the difference between a stressful struggle and an easy nail-trimming session.
Choose a space away from household traffic, loud noises, and other pets that might trigger anxiety in your feline friend.
Here are four ideal locations for stress-free nail trimming:
- A cozy bedroom with the door closed
- A bathroom with soft towels for comfort
- A sunny window spot where your cat already enjoys relaxing
- A favorite couch or chair where your cat feels secure
Consider using distraction techniques like having treats nearby or softly playing calming music designed specifically for cats. Additionally, regular grooming techniques can help your cat become accustomed to having their paws handled, making nail trimming easier.
You’ll find your kitty much more cooperative when they feel safe and undisturbed.
Gather Supplies First
Four essential supplies should be gathered before you attempt to trim your cat’s nails, guaranteeing a seamless, stress-free experience for both of you.
First on your supplies checklist should be high-quality cat nail clippers designed specifically for feline claws—human nail clippers won’t cut it!
Next, grab some treats to reward your kitty’s cooperation.
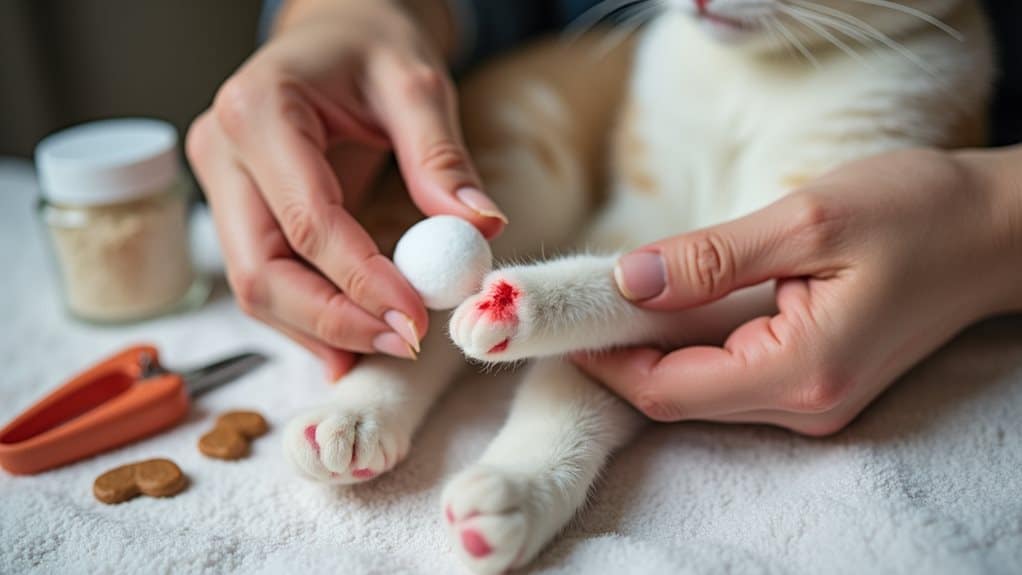
Third, keep styptic powder nearby in case you accidentally cut the quick and cause bleeding.
Finally, have a soft towel ready for gently wrapping your cat if they become squirmy.
One of the best nail trimming tips: arrange these items within arm’s reach before you begin.
There’s nothing worse than having your cat positioned perfectly, only to realize your clippers are in another room!
Your preparation will help keep the experience calm and positive, as regular nail trims contribute to the overall health and comfort of your cat and prevent issues related to overgrown claws.
Pre-Trim Petting Session
Now that your supplies are in order, let’s focus on setting the right mood for nail trimming success. Creating a calm atmosphere is essential for both you and your feline friend. A pre-trim petting session helps your cat associate nail care with positive experiences.
- Begin with a 5-minute cuddle session in your cat’s favorite spot, speaking in soft, reassuring tones.
- Gently massage your cat’s paws while offering their preferred treats as pre-trim rewards.
- Try calming techniques like playing soft classical music or using a pheromone diffuser 30 minutes before trimming.
- Practice touching your cat’s paws without clippers first, praising them for staying relaxed.
Additionally, creating a stress-free environment with comforting scents can further enhance your cat’s sense of security.
The Step-by-Step Nail Trimming Process
Trimming your cat’s nails doesn’t have to be a wrestling match that leaves both of you stressed. Understanding cat behavior is key to successful nail clipping techniques.
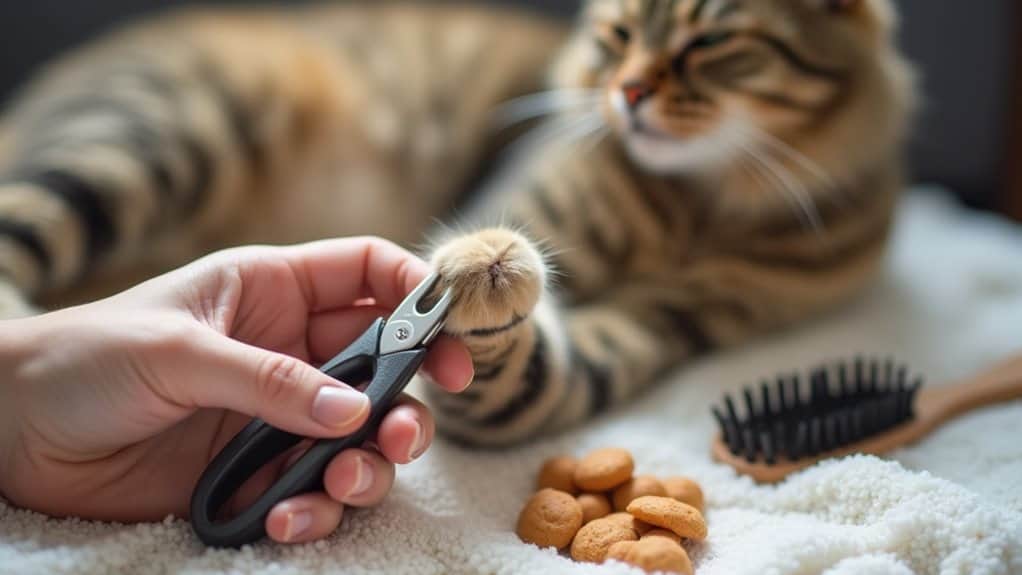
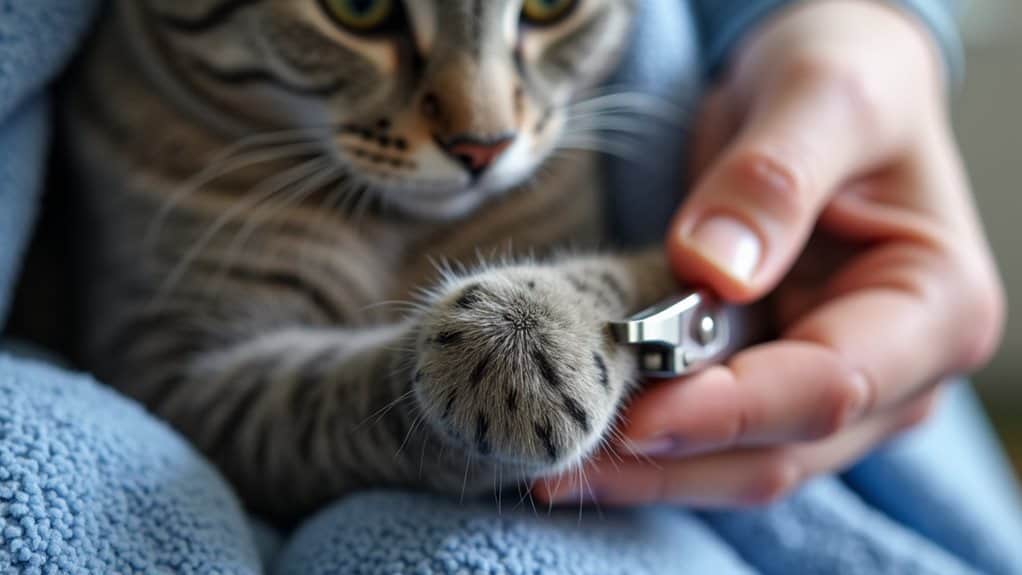
Begin by gently pressing your cat’s paw pad to extend the claws. Identify the quick—the pink area within each nail containing blood vessels—and aim to cut only the sharp, curved tip beyond it.
Hold the clippers at a 45-degree angle and make quick, confident cuts. If your kitty squirms, take a break rather than forcing the issue. Remember, you don’t need to trim all nails in one session! Many cats tolerate front paws being done first, with back paws saved for later.
After each successful trim, reward your furry friend with treats or praise to create positive associations. Additionally, creating a calm environment can significantly reduce anxiety for both you and your cat during the trimming process.
What to Do if You Accidentally Cut the Quick
Even the most careful cat parents sometimes make mistakes during nail trimming sessions.
If you accidentally cut the quick, don’t panic! The quick contains blood vessels, and while quick bleeding can be scary, it’s usually not serious. Have a plan ready to handle this situation calmly.
- Apply styptic powder or cornstarch immediately to stop the bleeding.
- Comfort your cat with gentle pets and a soothing voice while using calming techniques.
- Give your furry friend a special treat to help associate positive outcomes with the experience.
- Monitor the paw for the next 24 hours to guarantee proper healing. Additionally, regular grooming helps early detection of health issues, allowing you to spot any concerns promptly.
Training Your Kitten to Accept Nail Trims
Start working with your kitten early to make nail trimming a positive experience, not a dreaded chore. You’ll build trust faster when you keep training sessions brief, giving treats and praise after each successful attempt. Additionally, positive reinforcement during grooming sessions can help create a calm and enjoyable atmosphere for both you and your kitten.
Start Young, Stay Positive
When your kitten is young, introducing nail trims can set the stage for stress-free grooming sessions throughout their life.
Kitten acclimation works best when you pair handling paws with positive reinforcement like treats or gentle praise. You’ll find your furry friend becomes more comfortable with the process when they associate it with good experiences rather than stress.
- Touch their paws daily – gently press each pad to extend the nail while offering treats
- Let them sniff the clippers – familiarize them with the tool before using it
- Keep sessions short and sweet – 2-3 nails at a time prevents overwhelming them
- Celebrate small victories – praise and treats after each successful trim builds confidence
Short Sessions Build Trust
Building on those kitten-friendly techniques, let’s focus on the power of brief training sessions.
Keep nail trimming sessions super short at first—just 2-3 minutes. Your cat will be more receptive when they know the experience won’t drag on forever. During these mini-sessions, focus on handling just one paw or even trimming a single nail before offering a treat and ending on a positive note.
Trust building happens gradually, so don’t rush the process. Each successful short session creates a foundation for the next one. Your cat learns that nail trims aren’t scary and always end with something pleasant. This positive reinforcement creates lasting associations that make future trims easier.
Remember to praise your cat throughout the session, using a calm, reassuring voice that signals everything is fine and normal.
Alternative Methods for Difficult Cats
Some cats simply won’t tolerate traditional nail trimming, no matter how patient you’ve been or how many treats you’ve offered.
Don’t worry – there are several effective alternatives that can make the process less stressful for both of you.
- Wrap your cat in a soft towel like a “purrito” with just one paw exposed at a time to provide security while limiting movement.
- Try distraction techniques like applying a little wet food or treat paste to a surface they can lick during the process.
- Consider nail caps that glue onto your cat’s claws as a trimming alternative.
- Use positive reinforcement consistently, even when using alternative methods, to build positive associations over time.
Remember that patience is key – your cat can sense your frustration, so stay calm and collected.
Establishing a Regular Nail Care Routine
A consistent nail trimming schedule forms the foundation of successful cat claw management. Most cats benefit from nail trims every 2-3 weeks, but you’ll need to discover what works best for your feline friend.
Try incorporating nail checks into your regular grooming sessions by gently pressing your cat’s paw pads while they’re relaxed.
Start your cat grooming schedule when your pet is young, if possible. Those early positive associations with nail trimming techniques make lifetime maintenance much easier!
Consider creating a relaxing ritual—maybe after playtime when your cat is tired, or during a favorite TV show when you’re both calm.
Frequently Asked Questions
How Often Should I Trim My Older Cat’s Nails?
For older cats, you should check their nails every 2-3 weeks. You’ll likely need to trim them monthly. Proper nail trimming frequency becomes more important in older cat care as they’re less active and scratch less.
Can I Use Human Nail Clippers on My Cat?
While you can use human nail clippers in a pinch, cat nail clippers are specially designed for your cat’s curved nails and provide better visibility. They’re safer and make the trimming process easier for both of you.
Do Indoor Cats Need Nail Trimming?
By Zeus’s thunderbolt, yes! You’ll need to trim your indoor cat’s nails every 2-3 weeks. Their indoor lifestyle prevents natural wearing down, and regular trimming maintains proper nail health and protects your furniture too.
Should I Trim All Paws in One Session?
No, you don’t need to trim all paws at once. Try a gradual approach, pacing sessions based on your cat’s comfort level. Start with just a few nails and build up over time.
Are Nail Caps a Good Alternative to Trimming?
Like having tiny mittens, nail caps offer benefits like furniture protection without trimming. However, they have drawbacks including regular replacement, possible discomfort, and they don’t address your cat’s natural need to maintain nail health.
Final Thoughts
With consistent practice, you’ll become a nail-trimming ninja for your feline friend! Remember, patience is key—Rome wasn’t built in a day, and neither is your cat’s comfort with grooming. By following these steps and maintaining regular sessions, you’re not merely preventing furniture damage; you’re actively contributing to your cat’s health and wellbeing. So grab those clippers, put on your favorite vinyl record, and make nail care a positive bonding experience for both of you.